Binary Ninja Workflows: Fixing branch obfuscation
If you've been reversing x86/x64 for a while then you will have definitely come across functions that end like this:
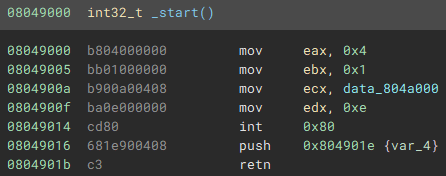
We know two things here:
The
RET/RETNopcode in x86/x64 pops the stack and jumps to that addressThe
PUSHbefore the return here is actually the address we're about to jump to
It's normal for a disassembler explore a function, traversing all branches, and terminate each when it gets to a RET opcode. For a decompiler/lifter it's also generally important to trust RET opcodes and turn them into return statements, and this is why it's using PUSH/RET combinations is a good obfuscation tool.
A sample app
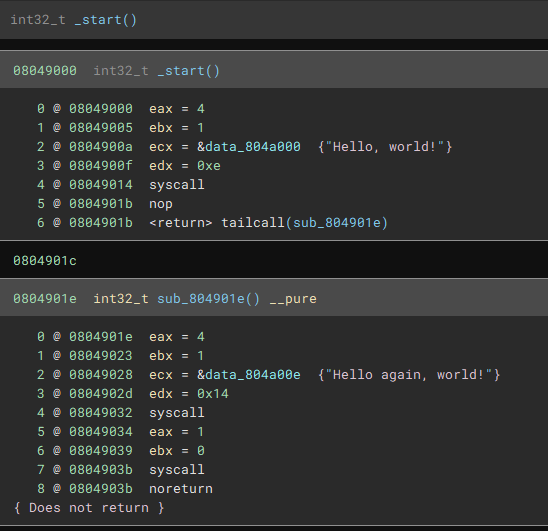
We'll start with a simple app that we can load up into Binary Ninja, source code is here. As we can see, it picks up the initial function right through to the RET opcode and then stops, and it doesn't find the rest of the function:
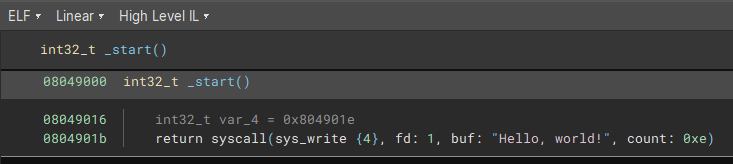
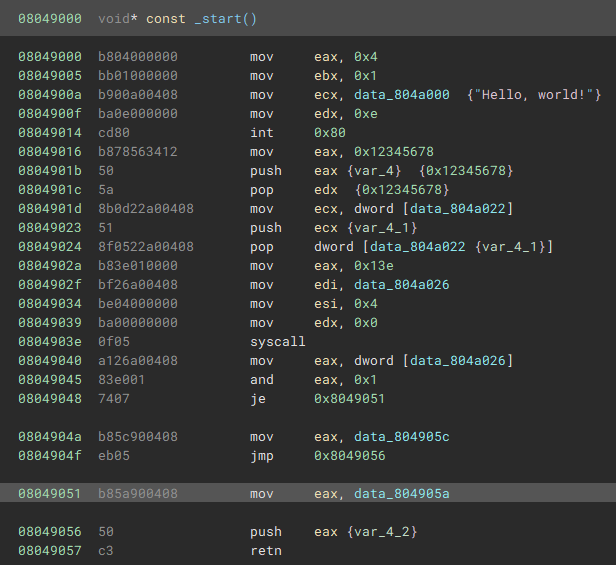
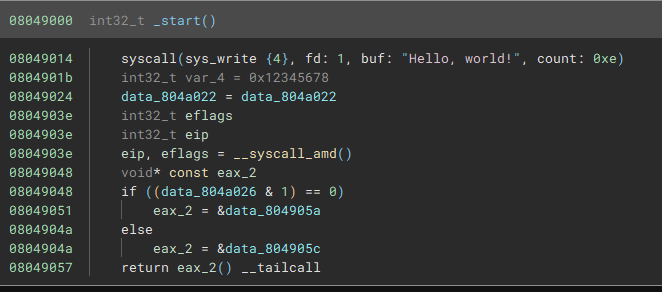
This is quite confusing from the high level IL, as it looks like it's calling a syscall and returning the response. There's a var declared that isn't used either, this is kind of weird. The low level IL makes it a bit more clear what is happening here:
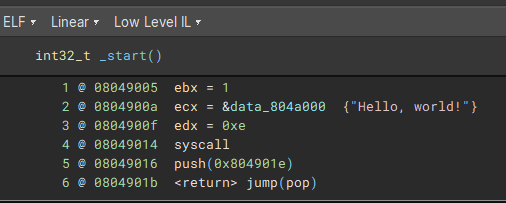
I initially thought that the LLIL had actually interpreted the push/pop/jump correctly, but this is actually just the notation for printing a return statement. In practice it's not being clever here, it literally just has a return statement on line 6.

What we want to do is hook the LLIL and convert this LowLevelILRet instruction into something that the higher level ILs can handle properly. We'll look into 2 potential options, but first, let's take a look at how to build a basic workflow to hook into the analysis and make our own changes.
Binary Ninja workflows for hooking LLIL
The way that we hook into the Binary Ninja lifters is by using their Workflow API. The BN team recommended that I do try this in C++ and definitely don't try this in Python. They are almost certainly correct, but I also wanted to see how the Python API works and it seems to be okay. You have been warned though.
Here be dragons

Workflows are disabled by default, and the BN team describe it as an "Early Feature Preview", so expect things to change in future versions. I'm doing this in Binary Ninja version 3.5.4526 so if you're on a different version the there's a good chance these examples might break.
Replacing fake returns with tailcalls
pwf = Workflow().clone("PopRetTailcallWorkflow")
def interpret_popret(analysis_context):
    # iterate over llil basic blocks
    updated = False
    for block in analysis_context.llil.basic_blocks:
        # check if we have push;ret
        if len(block) >= 2 and isinstance(block[-1], LowLevelILRet) and isinstance(block[-2], LowLevelILPush):
            # replace push with a tailcall
            analysis_context.llil.replace_expr(block[-1], analysis_context.llil.tailcall(block[-2].operands[0].expr_index))
            analysis_context.llil.replace_expr(block[-2], analysis_context.llil.nop())
            updated = True
    # we need to redo the ssa then
    if updated:
        analysis_context.llil.generate_ssa_form()

pwf.register_activity(Activity("extension.popretworkflow.interpretpopret", action=interpret_popret))
pwf.insert("core.function.generateMediumLevelIL", ["extension.popretworkflow.interpretpopret"])
pwf.register()
Most of this is copied from the sample python workflow and takes inspiration from c++ tailcall example. We'll go through step by step to see what it does:
pwf = Workflow().clone("PopRetTailcallWorkflow")
def interpret_popret(analysis_context):
    # ...

pwf.register_activity(Activity("extension.popretworkflow.interpretpopret", action=interpret_popret))
pwf.insert("core.function.generateMediumLevelIL", ["extension.popretworkflow.interpretpopret"])
pwf.register()
Here we create a new Workflow object called PopRetTailcallWorkflow. We register an Activity called extension.popretworkflow.interpretpopret and point it at our new interpret_popret function. Once this is set up, we need to insert it into the current workflow. We can use pwf.show_topology() to see what the base workflow looks like:
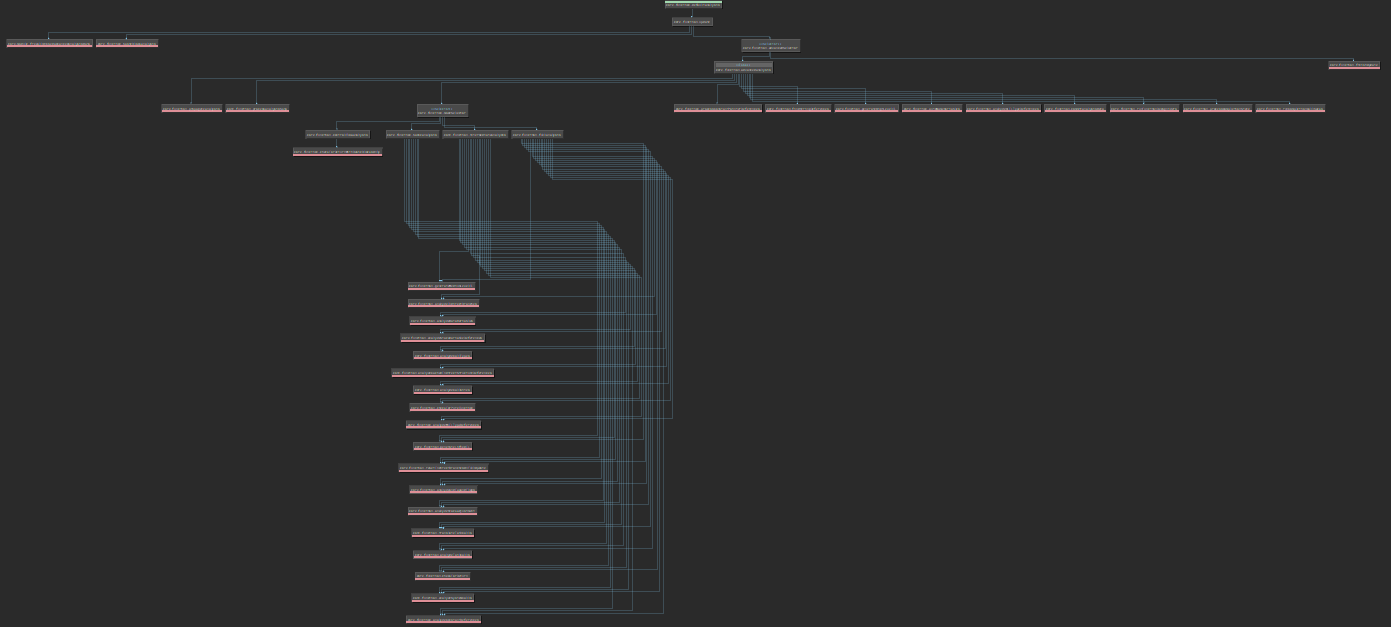
If we zoom in on the lower half we see this:
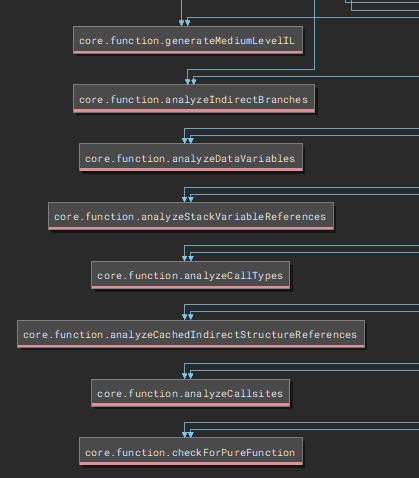
I am guessing here but I'm assuming we want our workflow to happen before the MLIL gets generated, so I've set up my workflow to be inserted just before this:
pwf.insert("core.function.generateMediumLevelIL", ["extension.popretworkflow.interpretpopret"])
Our function for the workflow is fairly straightfoward:
Iterate over very LLIL basic block
for block in analysis_context.llil.basic_blocks:
Check if the final two instructions are a PUSH followed by a RET:
if len(block) >= 2 and isinstance(block[-1], LowLevelILRet) and isinstance(block[-2], LowLevelILPush):
We want to replace this with a LLIL tailcall, which means replacing one of the instructions with this and replacing the other with a NOP (I couldn't find a way to delete existing LLIL instructions)
analysis_context.llil.replace_expr(block[-1], analysis_context.llil.tailcall(block[-2].operands[0].expr_index))
analysis_context.llil.replace_expr(block[-2], analysis_context.llil.nop())
updated = True
The nice thing with this is that we don't care if the PUSH is a constant or a register, we just take the expression index out of the PUSH instruction and put it in the tailcall and Binary Ninja does the rest for us.
Testing out the tailcall replacement
You can load this as a plugin, but you can also just paste this in the python console and it will register the workflow:

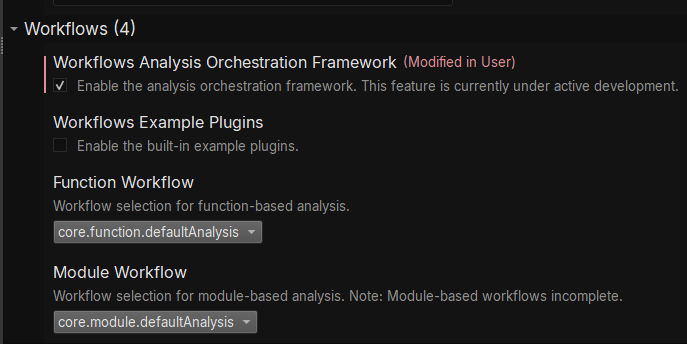
We also need to make sure workflows are turned on in settings (Edit->Preferences->Settings) and tick the checkbox for "Enable the analysis orchestration framework":
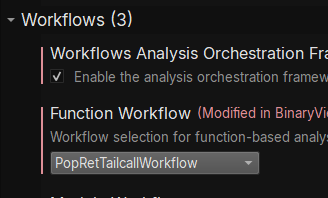
Then you need to reload your binary to kick off the framework, go to File->Open with Options, load your binary, and then choose your new workflow in the next dialog that pops up:
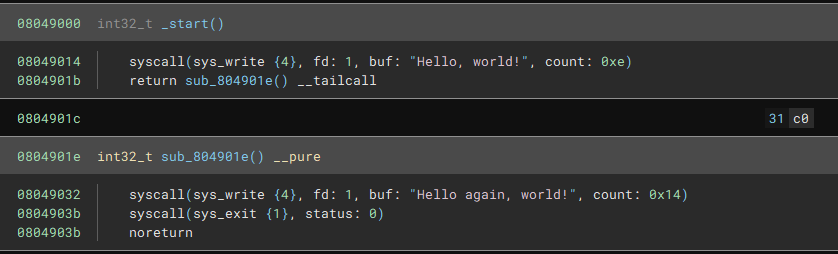
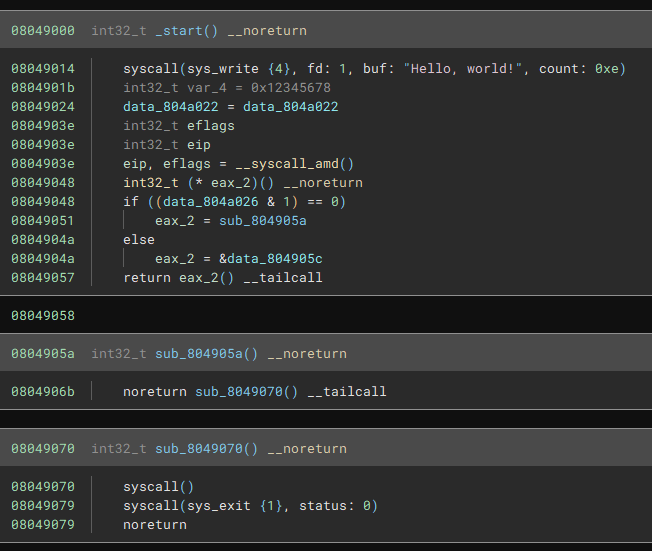
HLIL looks a bit different now:

It doesn't automatically create a code section for us (exercise for the reader?) but we can also just follow the jump and convert it to a function (sometimes pressing P doesn't work and you need to actually change the type with Y and then it will decompile it correctly):
And if we look at the LLIL we can see where our new instructions took place:
I have a second binary, stackops, that looks like this with the default workflow:
But the HLIL comes out like this:

If we load with our new workflow it correctly catches the indirect jump:
As with the above example, we need to then convert these addresses to functions so we can analyse from there:
Next steps
Solving this simple PUSH;RET case is a start, but this can easily be foiled by inserting junk instructions before the final RET instruction. There are some other issues too:
The indirect jump might not be a separate function, but just an obfuscation inside an existing function. We might want to make a
JMPinstead of a tailcallIf we're jumping to something that wasn't declared as code then we might want to mark it as code and kick off analysis there
There are multiple ways of manipulating the stack before making a
RET, so full stack analysis could tell us if we're actually making a fakeRETor a real one
Let me know if you take this concept and extend it, this just scratches the surface and there are lots of options for taking it further.
Happy hacking everyone!